Friday, December 17, 2010

Chocolate Covered Orange Peel

This has been a favorite of my dad's for as long as I can remember, and as I have gotten older, my tastes have changed enough that now I love it too. This is the third time I have attempted this treat (only the second successful one), and this is definitely the best recipe I have found for it. Enjoy.

Chocolate Covered Orange Peel

Makes about 2 1/2 cups

3 large navel oranges, scrubbed

3 tablespoons light corn syrup

1 cup sugar

1 cup water

12 ounces bittersweet chocolate (The best you can find)

For the Peel

Using a sharp knife, cut a thin slice off the top and bottom of each orange to expose the flesh. Score the peel of each orange into quarters, cutting through the white pith, and carefully pull the quarters of peel off the orange. Using a sharp spoon, scrape off any stringy membranes from the inside of the peel (do not scrape off the white pith). Cut each quarter crosswise into 1/4-inch-wide strips.

*A few other recipes I have tried in the past instructed the removal of the pith. Don't do it. The pith is what soaks in the sugar, and prevents the peel from becoming incredibly sticky. It also leaves more peel, which means more flavor.*

Put the orange peel in a large heavy saucepan, add cold water to cover and bring to a boil. Drain. Repeat two more times (blanching the peel removes the bitterness).

Return the orange peel to the saucepan, add cold water to cover by about 1 inch and bring to a boil. Reduce the heat and simmer gently, stirring occasionally, until the peel is tender when pierced with a knife, about 15 minutes. Drain and set aside.

Combine the corn syrup, sugar and water in the same saucepan in which you blanched the peel and bring to a boil, stirring to dissolve the sugar. Add the orange peel.

Bring to a simmer, reduce the heat and simmer gently, stirring once or twice, until the peel is translucent and very tender, and the syrup has reduced to about half a cup, 45 minutes to an hour.

*Do not allow the syrup to reduce to less than this, or the bottom of the pan will become too hot and will crystallize the sugar. Seriously. I tried doing this last year, and melted the pan because I fell asleep.*

Using a slotted spoon or a fork, transfer the peel to a wire rack to drain, separating all the strips of peel. (I use a cookie sheet covered in wax paper. Less clean up afterward.) Let cool and let stand until dry, at least 4 hours - overnight is best.

Once the orange peel is thoroughly dry, it can be stored in an airtight tin at room temperature for up to 1 week.

For the Chocolate

Melt the chocolate in a double boiler. This involves filling the bottom pot about half full with water, putting the chocolate in the top pot, and heating uncovered at a low temperature. If you do not have a double boiler, you can improvise one with a pot and a glass bowl.

Melt the chocolate, and stir to make sure it is smooth.

Turn off the heat. Dip each piece of peel in the chocolate and cover as much as desired. Lay on a piece of wax or parchment paper to dry. You may have chocolate left over, so have some other dried fruit or nuts on hand to dip. I used dried cranberries and pieces of candied ginger.

This is a time consuming recipe, so make sure you are into it before attempting. It is delicious though, and not terribly difficult, so it is good for someone just starting out in the chocolate making field. I find it helps to listen to the soundtrack for Chocolat to put you in the mood. :)

Tuesday, November 30, 2010

Post-Thanksgiving Recipe - Thanksgiving Leftover Casserole

If you're like me, you probably have a Tupperware container full of chicken/turkey/grouse/ostrich/Big Bird in your fridge right now. If you're also like me, the idea of pulling out a piece of meat - touching it in any way - and eating it repulses you. So, what are you to do with all of that food, which, given a few weeks, may resolve itself into some mutant, eyeless freak of nature and peck you to death in your sleep?

You do this.

Thanksgiving Leftover Casserole

1 can of cream of celery soup
1/2 bag frozen peas (about 8 oz)
1/3 C milk
2 C chicken
3 C stuffing

Add soup, peas and milk to a microwave safe bowl, cover. Microwave 3 minutes, stir and re-cover, then microwave 4 minutes more.

Add chicken and two cups of stuffing, stir, top with remaining stuffing. Microwave uncovered for 7-9 minutes.

Saturday, November 27, 2010

Thanksgiving Weekend

This year for Thanksgiving, rather than try to split time between four households and two states, Dave and I decided to make our families come to us. The result was both of our mothers being here for a few days, exploring the wonder that is Maine.


Thursday we cooked and ate all day. I have never done much of the cooking for a holiday before, and I was amazed at how tiring it is. I passed out pretty much as soon as my head hit the pillow that night.


On Friday, because my mom wanted to, we all went to the beach. It was freezing but we all acted like little kids - picking up shells and rocks, running from the waves, in my case taking far too many photos and being grossed out by the very dead seal on the shore.


We even got a surprisingly good photo of all of us.

Dave, his mom, me, my mom

For the rest of Friday and much of Saturday we ate, shopped, and just lazed around.

On Sunday we went into Portland to eat and shop more (are you beginning to see a theme here?).

We found a human sized lobster wandering the streets of Portland, no doubt advertising for some restaurant. Naturally, I got a picture with it. The back of his/her shirt said "Eat Me".


Dave and I had seen a harbor seal in the bay they last time we were in Portland for lunch, so we walked down a pier to see if we could spot some more. Sadly, we didn't, but the view was still worth the trip.

It was a really fun weekend - I'm glad we decided to be difficult and make Mohammad come to the mountain.

Thursday, November 25, 2010

Thanksgiving Menu!

Appetizer:
Baked Brie with Apple Butter

Main Course:
Chicken (I hate turkey) with apple and cranberries

Side dishes:
Cranberry sauce (the one from a can, I love it)
Sweet potatoes
Stuffing
Confetti Green Beans

Dessert:
Noodle kugel with apple pie filling
Jello salad
Blackberry pie
Pumpkin pie

Thanksgiving recipe #7 - Harvest Chicken

The chicken was probably the easiest thing we made today - using a crock pot to cook it not only made it self sufficient, but it kept the oven free for the hundred and one other dishes we were making. For this we added to a recipe my mom had used recently, to much success.

Harvest Chicken

1 whole chicken, and additional parts depending on how many people you are feeding
Apple cider (I used cinnamon apple cider for added flavor)
4 apples, sliced
dried cranberries
mulling spices (cinnamon, cloves, nutmeg, orange peel, etc)

Set the crock pot to cook for 6 hours - this will allow the chicken to cook for a while, and keep it out of your hair all day, but it wont get too dry.

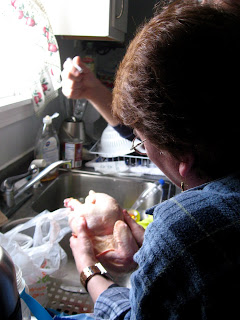
Make sure the chicken is cleaned out, remove all wayward feathers.


Put the chicken in the crock pot.

Cover the chicken with apple cider - use enough to fill the crock pot halfway. Drop in dried cranberries and mulling spices, cover the top with apple slices.


Cook for the full six hours.

Make sure to remove all bones and cloves - cloves are edible, but kinda nasty, so try to avoid them.

The chicken was delicious, and we even used the serving plate my grandmother sent us :)

Wednesday, November 24, 2010

Thanksgiving recipe #5 -Blackberry Pie

Yet another dessert - only one more after this, I promise :)

The store had a buy 1, get 2 free sale on blackberries, so this is the result. I found this recipe on allrecipies.com, and made a few changes as per the comments. Hopefully it tastes as good as it looks.

Update: It did. If not better.

Blackberry Pie

4 C fresh blackberries
1/2 C white sugar
1/4 C instant tapioca
A 9 inch double crust pie (store bought, I didn't have the patience for a hand made one)
eggbeaters
white sugar

Place the bottom crust into pie pan, brush with a little bit of egg or eggbeaters (this prevents the crust from becoming soggy). Combine 3 1/2 cups berries with the sugar and tapioca - mix until there are no clumps of white anymore, all dry ingredients stick to berries. Spoon the mixture into pie shell.

Spread the remaining 1/2 cup berries on top of the sweetened berries, and cover with the top crust. Seal and crimp the edges. Brush the top crust with egg, and sprinkle with sugar.

Bake at 425 degree F (220 degrees C) for 15 minutes. Reduce the temperature of the oven to 375 degrees F (190 degrees C), and bake for an additional 20 to 25 minutes.


Thanksgiving recipe #4 - Jello and Marshmallow Salad

This is another desert recipe - it is beginning to look as though we will have 4 deserts tomorrow, oy - and one that comes from Dave's family rather than mine. I idea of marshmallow salad always kind of put me off, but this is insanely delicious.

Grammy’s Green Jello and Marshmallow Salad

1 3oz pkg Lime Jello
¼ C sugar
1 C hot water
1 1/2 C miniature marshmallows
1 C crushed canned pineapple, fully drained of liquid
1 C cottage cheese (small curd)
1 C chopped walnuts (optional)
1 C heavy whipping cream (whipped) or Cool Whip

Mix together jello and sugar, then add hot water and stir until fully dissolved.

Add marshmallows, stir and let cool - wait until the jello feels like it is starting to set.

Add pineapple, cottage cheese and walnuts. Fold whipping cream into jello mixture, cover and chill in refrigerator for several hours until set - overnight is best.